One of a Kind Creativity

Creative Projects and Crafts

File Box with Letter Labels {A Silhouette Project}

I will be the first to admit I have been on an extreme organizing frenzy lately.  I recently purchased this Recollections 3 Drawer File Box at Michael’s to use as my “Command Center.”  I wanted to add labels to each of the drawers, so I decided to use the crafter’s best friend, my Silhouette Cameo!

I created the letters using the Silhouette Software and the Chunk Five font, which is available as a free download on various font websites.  I used Silhouette Printable Cotton Canvas for the letters.  This is an awesome medium with adhesive backing.  Not only does the canvas look great in my opinion, but the adhesive backing added extra simplicity to making the labels.

File Box

This was a very quick and easy project, and I love the result!  Now to put my Command Center to work!!

**Disclosure:  All opinions in this post are solely mine.  I am in no way affiliated with the Silhouette Brand or Michael’s and was not compensated to write this post.

Leave a comment »

Valentine’s Day XOXO Sign

My creative juices were flowing today in the spirit of Valentine’s Day.  I decided to make a cute XOXO sign to hang on the wall.  This was a quick and easy project, and I absolutely love the outcome!

XOXO

Supplies:

  • 2 of each X and O wooden letters
  • Craft Paint
  • Paint Brush
  • Ribbon
  • Hot Glue Gun

After painting the wooden letters and letting the paint dry completely, I attached the letters with ribbon and added a ribbon loop at the top for hanging.

Did I mention how much I love the final project? 😀

Happy Crafting!

Leave a comment »

Glittery Christmas Ornaments

I decided to make some Christmas ornaments this year, and this project has turned out to be one of my favorite!  It’s quick, easy, and relatively inexpensive.

Glittery Christmas Ornament

I picked up some 1 1/2 inch wooden discs at Hobby Lobby and a pack of glitter cardstock at Michael’s.  (I couldn’t pass up the 50% off sale in addition to my 25% off coupon!!)  I had white ribbon on hand at home.  To simplify the project, I used a 1 1/2 inch circle punch and a small star punch as well.

After punching some circles and stars from the cardstock, I used Mod Podge to adhere the circles to the wooden discs.  I then topped each ornament with a star using Mod Podge.  After the ornaments dried, I added the ribbon with my hot glue gun.

I’m loving the final product and can’t wait to add these beauties to our Christmas tree this year!

Leave a comment »

Mason Jar Coin Jar

Over the past few months, I have accumulated a ton of change in my desk drawer at work.  When I finally got around to bringing it home, I filled a sandwich bag.  At that point, I knew I needed a better solution for all those random coins.  I’ve had a pack of mason jars lying around the house for a while and I decided they could be used for the perfect fix to my bad change habits.

Using a pint size mason jar, I created a simple coin jar.  This is a quick and easy project that has turned out to be quite useful in my life!

Supplies:

  • Mason jar
  • Scrapbook paper
  • Cardstock
  • Pencil
  • Scissors
  • Mod Podge and paint brush
  • Glue or tape

Steps:

  • Trace the jar lid onto the back side of the scrapbook paper and the cardstock.  If you are using a lighter weight paper, I highly recommend using cardstock in addition to the scrapbook paper.  This will make the finished product sturdier.  I used a piece of white cardstock since my patterned paper is what will be showing in the end.
  • Cut out the traced circles.
  • Using your best judgement, draw a rectangle on the back side of the scrapbook paper for the coin slot.  I used a quarter as a guide.
  • I decided to apply a thin layer of Mod Podge to the scrapbook paper to protect it.  This is optional, but recommended.
  • Once the Mod Podge is dry, cut out the coin slot rectangle using a scissors or an X-Acto knife.  At this point, you should only have a coin slot on the scrapbook paper.
  • Using the scrapbook paper coin slot as a guide, draw a coin slot rectangle on the cardstock.  Cut out this rectangle.
  • Glue or tape your scrapbook paper and cardstock together, being sure to line up the coin slots.
  • Set your circle inside the mason jar lid.  You will not need the part with the seal.  Screw the lid on the jar and enjoy your new coin jar!

I hope you find this project fun and helpful!

Leave a comment »

Framed Christmas Tree

In the spirit of Christmas in July, I decided to start thinking about some crafty holiday decor a little early.  I was quite impressed with the idea I came up with as even I didn’t realize my mind was this creative 🙂  This project was very simple, but I love the results!

Christmas JoyI used an 8×10 photo frame, scrapbook paper, an assortment of white buttons, and scrabble tiles to create this beauty.  I first cut the scrapbook paper to fit the frame.  I then covered the scrapbook paper in Matte Mod Podge and let it dry thoroughly.  After it was dry, I adhered the first layer of buttons in the shape of a Christmas tree.  After trial and error with several types of glue, I actually used Mod Podge to glue the buttons.  I added to the first layer of buttons until I had a Christmas tree I was happy with.  To add the finishing touches, I glued scrabble tiles spelling “JOY” to the bottom of the scrapbook paper.  I again used Mod Podge to adhere these to the scrapbook paper.  After everything was completely dry, I put the scrapbook paper in the frame and put the glass behind it for extra support.

I’m very much looking forward to displaying my creation this holiday season!  Enjoy 🙂

Leave a comment »

Chevron Ribbon Wreath

After thinking long and hard about new decor for the front door, the chevron ribbon I recently purchased was the perfect inspiration for my latest project.  I decided to make a wreath using the ribbon and some small felt flower accents I picked up at Michael’s.  This was a quick and easy project and I’m loving the results 🙂

Chevron Ribbon Wreath

I used the following supplies to create my Chevron Ribbon Wreath:

  • 14 inch foam craft wreath
  • 2 rolls of chevron ribbon in corresponding colors
  • Hot glue gun
  • Felt flower accents

To make the wreath, I first cut the ribbon into 2 to 3 foot pieces so it was easier to work with.  I wrapped each ribbon piece around the foam craft wreath, securing each end with hot glue as I went.  To complete the wreath, I added four felt flowers and secured them with hot glue.

Did I mention I love the results?!?!  Happy Crafting 🙂

Leave a comment »

Mini Clipboards

I love to make lists.  Don’t ask me why, but I do.  In the spirit of my list making obsession, I decided to add some pizazz to a plain mini clipboard.  Not only does my decorated clipboard look fun, but it also helps me to stay organized with all my lists!

Clipboard Project 5

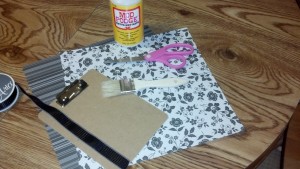
For this project, I decided to use two complementary pieces of scrapbook paper with a coordinating ribbon to complete the look I wanted.  To get started, I gathered the following supplies:

  • Clipboard (mini or regular sized)
  • Scrapbook paper
  • Mod Podge
  • Brush
  • Scissors
  • Paper Cutter
  • Pencil
  • X-Acto Knife
  • Ribbon
  • Glue Gun

Clipboard Project Supplies

I first measured a rectangle the size of the clipboard on the blank side of the scrapbook paper.  I used this method because I did not want any pencil markings around the edges of the clipboard.  Using my paper cutter, I cut out each rectangle.

Clipboard Project 2

For the paper I used on the top half of the clipboard, I first centered the paper over the clipboard and clipped the paper, design side facing up, to the clipboard.  I discovered the hard way that the design side needs to face up.  In my case, the clip was not perfectly centered.  Using the blank side of the paper resulted in the paper not fully covering the clipboard after I cut out the area for the clip.  I measured the gap between the top of the paper and the top of the clipboard.  This will be important in a bit.  To size the area needed for the clip, I marked slightly inside each edge of the clip on the scrapbook paper.  This was not an exact science, but it worked out OK for me in the end.  To mark the bottom of the clip, I added the gap measurement from earlier before marking the paper.  If you look closely at the picture below, you can see the outline of the clip area that needs to be removed from the paper.  

Clipboard Project 3

After cutting out this rectangle, I centered the paper on the clipboard and slid the paper under the base of the clip.  The nice part about the clipboard I used for this project is there was space underneath the clip base that I used to help hold the paper in place.  Next, I glued the paper onto the clipboard using Mod Podge.

Once the tricky part was over, I added the complementary paper to the bottom of the clipboard with Mod Podge, covering approximately 1/3 of the clipboard.  I let the Mod Podge dry for 5 minutes or so, then used the X-Acto knife to trim the excess paper from the edges of the clipboard.  To protect the paper, I added a coat of Mod Podge to the top of the papers.  I let this coat dry overnight.

Clipboard Project 7

In the morning, I added ribbon to the clipboard where the two pieces of scrapbook paper meet.  I measured enough ribbon to go all the way around the clipboard so that the ribbon ends would meet on the back side of the clipboard.  I used my hot glue gun to secure the ribbon, using a small dot of glue on both sides of the clipboard front and two dots on the clipboard back.

Clipboard Project 5

On a side note, if I do this project again (which I almost certainly will), I am going to create a template to use for cutting out the paper to go around the clip part of the board.  I think using a thin piece of cardboard would work perfectly for a template and will definitely simplify the process.

Leave a comment »

Decorative Pebble Magnets

I’ve been wanting to make some cute fridge magnets lately and I finally got around to it.  These decorative pebble magnets are an easy, quick, and super cute project.

Supplies:

  • Decorative pebbles
  • Scrapbook paper
  • Glue
  • Circle punch that is the size of your pebbles
  • Small Paint Brush
  • Magnets

Decorative Pebbles

Step by Step How To:

  • Clean your pebbles with soap and water if you wish.  I did this to make the pebbles shiny.  Make sure they are completely dry before continuing.
  • Punch circles from the scrapbook paper using the paper punch.
  • Apply a thin layer of glue to the patterned side of the scrapbook paper circle with the paint brush.  Press the scrapbook paper circle onto the pebble.  Make sure there are not any bubbles.  Allow the glue to dry for at least 15 minutes.
  • Apply a small dot of glue to the back of the magnet.  Press the magnet onto the pebble.  Allow the glue to dry for at least 15 minutes.
  • Enjoy your new decorative pebble magnets!
Leave a comment »

Upcycled Vases

These vases are a result of a  photo I saw online that inspired creative thoughts to start churning in my mind.  The end result is empty beer bottles turned into beautiful household decor.

Supplies:

  • Beer Bottles (You could also use wine bottles or something similar.)
  • Bucket and Dish Soap (for cleaning bottles)
  • Yarn
  • Elmer’s Glue

I first cleaned the beer bottles using a bucket of hot water and some dish soap.  Leave the bottles soak in the water for at least 30 minutes.  This will loosen the glue and allow the labels to peel off easily.  It does double duty by cleaning the bottles as well.  After the labels are peeled off, allow the bottles to dry thoroughly.

When choosing your yarn, thicker is better.  I chose a wool yarn in a beige color that I bought at Michael’s.  Starting at the top, I glued the yarn to the bottles in sections.

Yarn Vase 1

It is important to pull the yarn taught while gluing it to the bottle.  This will help the glue to hold better.  When I got to the bottom of each bottle, I added an extra dot of glue to secure the end of the yarn.  After letting the glue dry overnight, the bottles were ready for display!

Upcyled Vase Complete

Leave a comment »

Spring Grapevine Wreath

Our front door has been looking extremely bare since fall.  I knew it was time for a new wreath, but I was waiting for the perfect idea. Purple just so happens to be my favorite color.  When I came across this idea on Home Spun with Love, I knew I found just what I was looking for.  After a trip to Michael’s, I was ready to get started.

Spring Wreath 1

Supplies:

  • Grapevine Wreath
  • Wooden letter
  • Scissors
  • Pencil
  • Acrylic paint or spray paint (optional)
  • Scrapbook paper
  • Mod Podge
  • Paint Brush
  • Silk flowers removed from stems
  • Hot glue gun

Steps:

  • Trace wooden letter on scrapbook paper.  Carefully cut out the letter.
  • I chose to paint my letter with acrylic paint so the sides would match the scrapbook paper.
  • Once the paint dries, coat the wooden letter with a thin layer of Mod Podge and place the scrapbook paper cutout  on top.
  • Coat the top of the letter with a thin layer of Mod Podge.  This time, you will be using the Mod Podge on the scrapbook paper cutout to seal it.
  • Allow the Mod Podge to dry for several hours.
  • Arrange the silk flowers on the grapevine wreath as desired.  Use the hot glue gun to secure them.
  • Hot glue the wooden letter on the grapevine wreath.  If you prefer, you can tuck the letter into the wreath using some of the vines.

I was very happy with the outcome of our new wreath!  Pretty and purple – I couldn’t ask for more 🙂

Leave a comment »